- By tech@intempus.net
- In Build, Repairs
8 Expert Tips For Solid Hardwood Flooring Installation
Thanks to the rising popularity of engineered wood flooring, there are plenty of options to choose from when it comes to hardwood floors. Each flooring option has its own pros and cons, though solid hardwood is a classic option that comes with the added benefit of always being in style. The key to creating a beautiful look with solid hardwood floors is careful installation and some thorough prep work. Today, our San Jose construction team is sharing their tips for installing solid hardwood floors.
How to install solid hardwood flooring:
1. Choose which type of hardwood floor you’d like to use
You’ll need to consider which species of wood you prefer, and whether you’d like a custom finish or not. In addition to differences in appearance, each species will also have a unique hardness, stability, grain, and level of difficulty to work with. For more information about the different types of solid hardwood flooring you may wish to consider, take a look at The National Wood Flooring Association’s species gallery.
2. Determine how much square footage you need to cover
Once you’ve measured the square footage of the room(s) where hardwood floors will be added, order enough wood to cover the space, plus an additional 10%. This is a great way to avoid delays in the project later on if there are any defective or warped boards.
3. Remove baseboards and existing flooring
When installing solid hardwood floors, you’ll want to make sure you’re starting with a clean, even subfloor. This means you’ll need to remove any existing flooring before you can begin the installation process. Whether you’re installing your own hardwood floors or working with a professional, make sure to work carefully, as some old flooring may contain asbestos. Always call a professional for help if you’re unsure about whether or not you may be at risk of coming into contact with asbestos.
4. Let the wood get acclimated to the environment while you work on preparing the subflooring
Review the manufacturers’ instructions to understand how to tell when your boards have been properly acclimated to the area’s moisture level. Open the boxes of boards so that the wood can be fully exposed to the moisture level. Use a moisture meter to monitor the wood. In general, hardwood floors require at least 72 hours to become acclimated to a new environment, but always double check with your manufacturer’s instructions.
5. Make sure the subfloor is clean and level
Preparing the subfloor is one of the most important steps for installing hardwood floors correctly. Make sure the subfloor is free of any debris, dust, or other dirt that may have been underneath your old flooring. Next, check the subfloor’s moisture level to make sure it meets the manufacturer’s guidelines for your hardwood flooring. Talk to a professional if the moisture level is too high.
Next, you’ll need to make sure your subfloor is level. If there are high spots, these can be sanded down until smooth. For low spots, you can either shim the joints below or fill in the spots with either asphalt roofing shingles or construction felt. If you choose to fill in low spots, create a smooth surface by covering them with a layer of 3/8” plywood.
6. Install the underlayment
Once the subfloor is clean and level, you can install the underlayment. For this, you can use either felt paper or grade D kraft paper. Roll out the paper across the room, leaving some extra paper at each end to trim later, after the flooring has been installed. Overlap seams by roughly 6 inches, and secure the underlayment by stapling it to your subfloor.
7. Mark a starting line in chalk
First, mark the center of each wall in the room, and then use a chalk line to connect the opposite points. Measure the distance between the central point of the room and the starting wall, and remember to subtract the expansion gap. Snap a new line to mark the perimeter of where the flooring will lay. This ensures your wood flooring will be installed square to the walls, even if the walls are bowed or distorted.
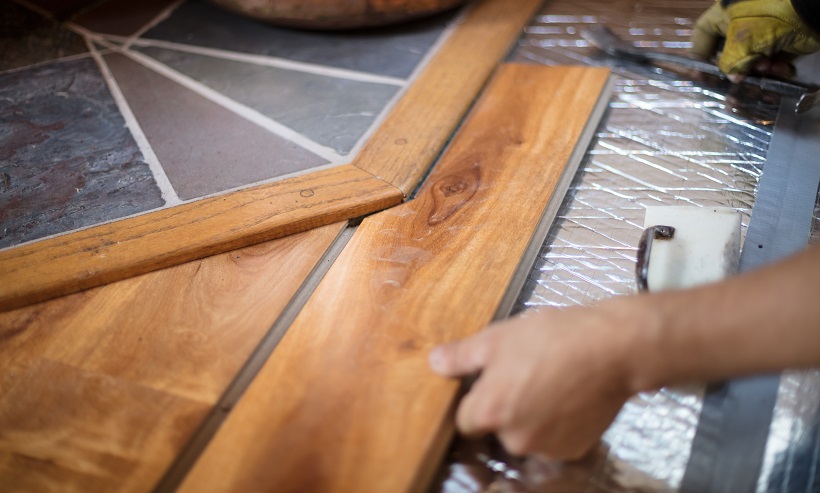
8. Start installing the solid hardwood
Make sure the first two rows of flooring you lay down are as straight as possible. If you calculate how many rows of boards there will be, you can also figure out if you’ll need to trim the first board to make room for the last board, without having to make the last board significantly slimmer than the rest of the boards.
As you begin laying down the flooring, alternate boards from different boxes in order to make sure the colors blend together and prevent obvious lines of demarcation where you transitioned from one box of boards to the next. Keep in mind that the boards should be installed perpendicularly to your flooring joists for maximum strength and durability.
Renovate your home with the best construction company in San Jose
Like many home improvement projects, installing solid hardwood floors is certainly easier said than done. That’s why our team of construction experts works so hard to provide you with the information and service you need to complete your home improvement projects successfully every time. If you’d like to learn more about how to renovate your property with the best construction company in San Jose, please contact us today!


